BEGINNER FRIENDLY GUIDE

How to Change a Tire
Complete Guide

A blown tire on the shoulder of a highway feels like a crisis, but the mechanical work itself is straightforward and repeatable. Eight steps, one tool you already carry in the trunk, and roughly fifteen minutes stand between you and the rest of your drive

This QuickCarFixes guide goes beyond the motions. Each step explains why the physics work, so you understand the reasoning and can adapt if conditions on the ground are not textbook

15 minRead time
8Simple steps

Step by Step Instructions

Every instruction includes the mechanical reason behind it, not just the action to perform

1

Pick Your Ground

The surface quality matters more than the distance from traffic

Car positioned safely with hazard lights activated on firm, level pavement

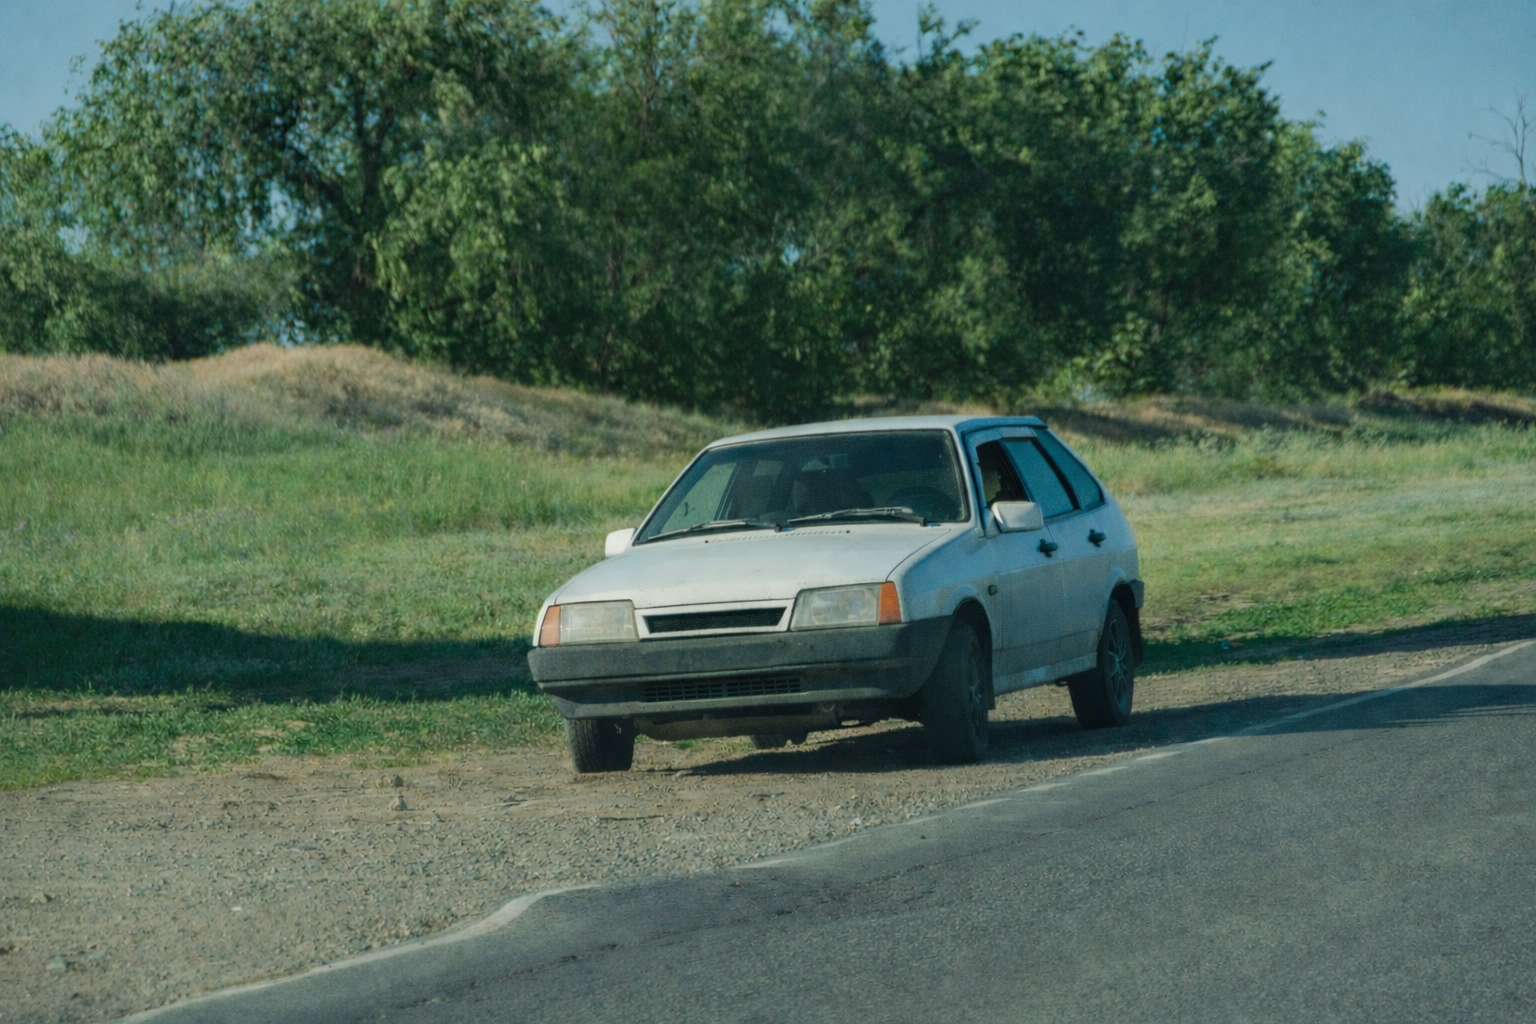
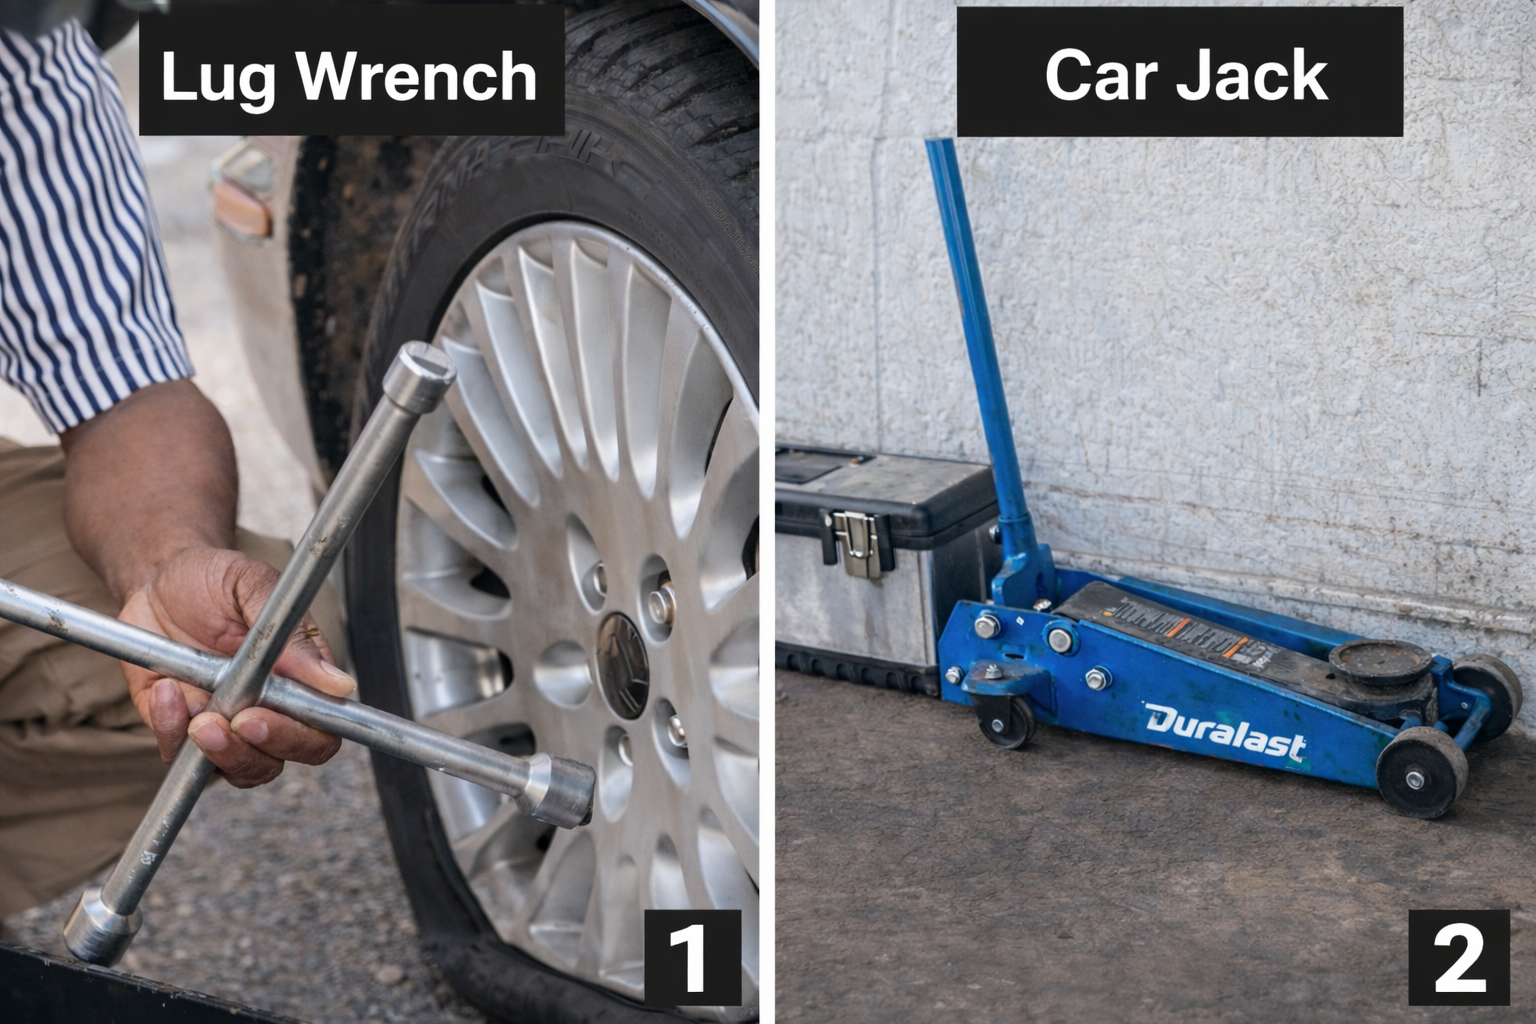
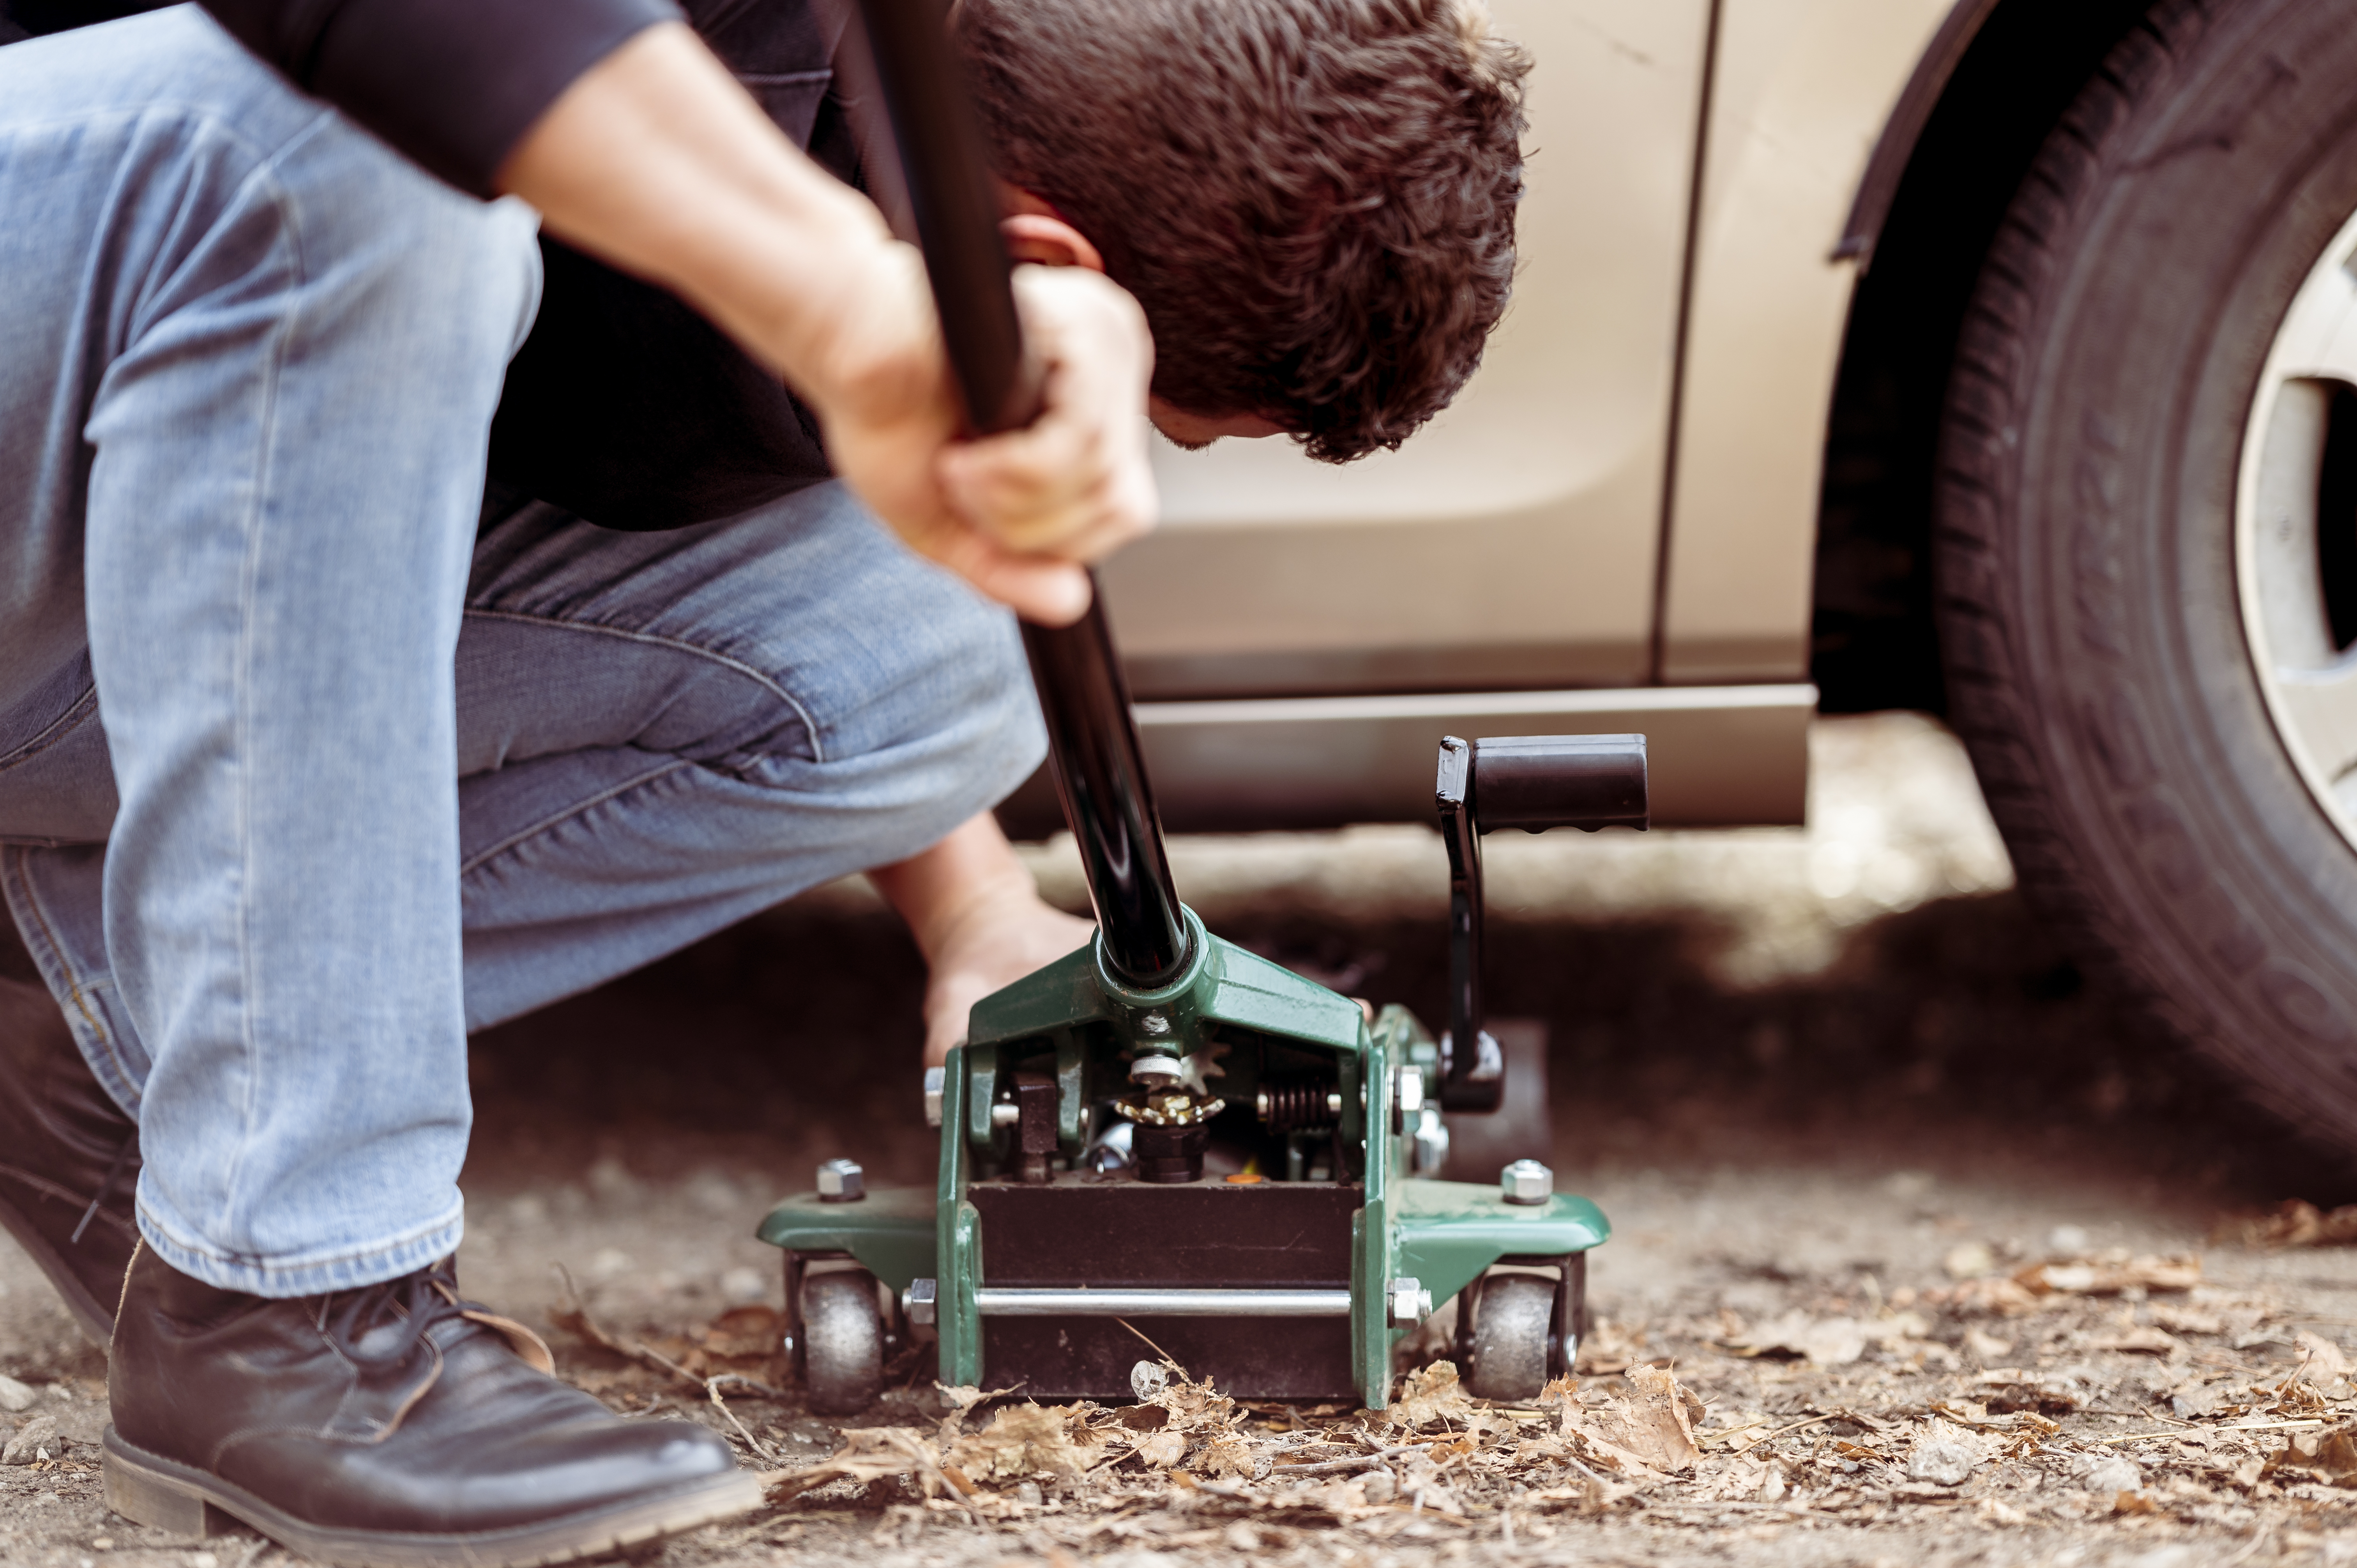
Your jack concentrates the entire weight of one corner of your vehicle onto a contact patch roughly the size of a credit card. That patch needs to press against something that will not compress or shift. Concrete and asphalt are reliable. Packed dirt is marginal. Gravel migrates under load, and grass or mud will let the jack base sink until the vehicle drops. A collapsing jack under a raised chassis is the single most common injury scenario in roadside wheel work

Once on solid ground, activate your warning flashers and lock the handbrake fully. Then place a heavy object, a rock, a bag, a wheel wedge if you carry one, against the wheel diagonally opposite the flat. The diagonal matters because that corner absorbs the most downward force once the damaged side is unloaded by the jack

💡

If you are on a narrow highway shoulder with no better option, stay inside the vehicle with your seatbelt on and call roadside assistance. A less-than-ideal location is not worth the risk of working inches from passing traffic at highway speed

2

Inventory Your Kit

Three items. Confirm the spare holds air before you start

Jack, wrench, and spare tire laid out beside the vehicle trunk

The entire job requires three things: a lifting device (scissor-type in most sedans, bottle-type in trucks and SUVs), a wrench that matches your wheel fasteners, and the spare wheel itself. In sedans these are usually stacked under the trunk floor panel. In SUVs and trucks, the spare is often bolted to the underside of the cargo bed and lowered with a cable mechanism accessed through a small hole in the bumper

  1. Jack (scissor or bottle type, stored with the vehicle)
  2. Wrench (cross-type or L-shaped, matching your fastener size)
  3. Spare wheel (full-size or compact donut)

Before you do anything else, press firmly on the sidewall of the spare with your thumb. A properly inflated compact spare holds around 60 PSI, which feels nearly rock-hard to the touch. If the rubber gives more than half an inch, the tire has bled pressure during months or years of storage. Mounting a significantly underinflated spare risks deforming the rim on the first pothole and leaves you stranded a second time

💡

Roughly one in seven drivers who pull over with a flat discover their spare is also unusable. Add spare pressure to your routine whenever you rotate tires or check inflation seasonally. Two minutes of prevention eliminates this failure mode entirely

3

Crack the Fasteners While Grounded

The physics only work when the rubber still grips the road

Wrench positioned on a wheel fastener with the tire still resting on pavement

This is where most first-timers go wrong. Factory-set torque on passenger car wheel fasteners runs between 80 and 100 foot-pounds. Overcoming that initial resistance requires a fixed point for the wheel to push against, and the only thing providing that counter-force is the friction between your tire tread and the pavement beneath it. Raise the vehicle first and the wheel spins freely in the air, turning your wrench effort into rotation instead of loosening. The result is a frustrating standoff where neither the fastener nor the wheel gives

With all four wheels still on the ground, fit the wrench onto each fastener and deliver a short, controlled push toward the left (as you face the fastener). A quarter turn is sufficient. If one resists, position the wrench handle horizontally and press down through your foot while holding the bodywork for balance. Avoid jumping onto the handle. The sudden spike in force can round off the fastener head or snap a stud that has corroded at its base

💡

Fastener completely seized? Apply penetrating oil at the junction between the nut and the stud thread, wait five minutes for capillary action to draw the solvent into the corrosion layer, and try again. The problem is almost always oxidation bonding, not raw tightness

4

Raise the Chassis

Millimeters of placement decide whether the body bends or holds

Jack saddle positioned precisely on the reinforced frame rail under the vehicle

Every vehicle has reinforced lift points engineered to absorb the concentrated load of a jack. On unibody cars, look for the pinch weld, a doubled-over seam of sheet metal running along each rocker panel behind the front wheels and ahead of the rears. On body-on-frame trucks and SUVs, the jack seats against the frame rail itself. Your owner manual illustrates the exact locations. Placing the saddle a few inches off target can crush a rocker panel, crack a plastic side skirt, or bend a suspension mount, turning a fifteen-minute repair into a bodywork bill

Crank steadily until the rubber lifts approximately two inches off the pavement. Additional height increases lateral instability without providing any mechanical advantage. A single-point scissor or bottle jack is designed to support vertical load only. It does not prevent the vehicle from sliding sideways if the ground shifts or if the chassis is bumped. Keep your body, and especially your limbs, outside the footprint of the vehicle at all times while it is elevated

💡

If the pavement feels warm and soft (fresh asphalt in summer) or the jack base starts to tilt as you crank, stop immediately and lower. Slide a flat board, a piece of plywood, or even a hardcover book from the trunk under the jack base to spread the load over a wider area

5

Pull the Damaged Wheel

If it refuses to budge, corrosion is the culprit, not weight

Flat tire being walked off the hub with fasteners stored safely in a container

Spin off every fastener by hand and drop them into a cup, a pocket, or the concave side of a hubcap. Losing even one on a dark shoulder at night converts a fifteen-minute task into a tow call. Then grip the wheel at the nine and three positions and walk it straight toward you off the hub studs

Wheels that have stayed mounted for years without removal often fuse to the hub face through a thin layer of iron oxide that forms between the two mating metal surfaces. If the wheel does not slide free after the fasteners are out, do not kick it or strike it with a tool. Both actions risk knocking the vehicle off the jack. Instead, sit on the ground facing the wheel, place both soles at the four and eight positions on the rim, and push outward with steady, even force. The controlled pressure cracks the corrosion seal without destabilizing the chassis. Once free, lay the wheel flat on the pavement so it cannot roll into the road

6

Seat the Replacement

Alignment before force. The wheel slides on, it should never be shoved

Spare wheel being aligned onto the hub studs with the valve stem facing outward

Lift the spare and line up the mounting holes with the studs protruding from the hub. On compact spares, confirm the valve stem faces outward. Mounting the wheel backward traps the valve against the brake caliper, making it impossible to check or adjust pressure later. On a full-size spare, either orientation works, but outward is standard practice

Thread each fastener on by hand until finger-tight. The sequence matters: begin with the topmost fastener, move to the one directly opposite, then continue alternating across the bolt circle. This draws the rim flush against the hub surface evenly rather than clamping one side first and leaving the opposite edge cocked at an angle. Cross-threading is easy when you are hurrying. If a fastener does not turn smoothly under finger pressure alone, back it out completely and restart the thread. Forcing a misaligned fastener strips the stud, and a stripped stud means the wheel cannot be secured at all

7

Two-Stage Tightening

Why a single round of torque is not enough

Wrench applying torque to fasteners with the wheel partially supporting vehicle weight

Lower the jack slowly until the spare makes contact with the pavement and begins to bear partial weight, but keep the jack engaged so the frame is still partially supported. In this position, ground friction prevents the wheel from rotating when you apply wrench force, while the partial suspension allows the rim to self-center against the hub mounting surface. Wrench each fastener firmly using the same alternating sequence you used during hand-threading

Then lower fully, pull the jack clear, and make one complete additional pass on every fastener. This second round exists because the act of transferring the full vehicle mass onto the wheel shifts the internal load distribution. Fasteners that felt firmly seated at partial weight can lose a fraction of a turn once the suspension compresses fully. When finished, each fastener should feel uniformly resistant under the wrench. If one feels noticeably looser or tighter than the rest, something is misaligned — raise the vehicle and investigate before you drive

💡

Own a torque wrench? Most passenger vehicles call for 80 to 100 ft-lbs. Going beyond that warps the brake rotor seated behind the wheel, which creates a pulsing vibration through the pedal under braking that only resurfaces the rotor or replaces it can fix

8

Post-Swap Verification

The repair is not complete when the jack comes down

Driver performing a visual and auditory check on the newly installed spare wheel

Stow the damaged wheel, the jack, and the wrench. Before merging back into moving traffic, drive the first half mile at a deliberate crawl and focus your hearing on the wheel area. A rhythmic thump or vibration that matches your road speed is the signature of a fastener that is not fully seated or a rim that is not flush against the hub. If you detect it, pull over immediately and retighten

Compact spares are engineered for a ceiling of 50 mph and an operating range of roughly 70 miles. Those numbers are structural ratings, not conservative guidelines. Exceeding them accelerates tread wear on the undersized tire exponentially and places an asymmetric load on the differential gears that are designed to compensate for small, not large, differences in wheel diameter. Get to a tire shop within 24 hours. If the original tire ran flat for any distance before you pulled over, ask the technician to inspect the inner liner. The sidewall may be structurally compromised even if the outer tread shows no visible damage, and a patch applied to a weakened carcass will not hold under sustained highway pressure

I hope this guide helped you. Want more car tips?

Explore our complete library of quick car fixes and beginner friendly maintenance guides

Browse All Guides